Categories
Overlanding

Planning, Checklists, Checks and Inspections

In the Army, we have procedures we follow prior to engaging in movements, missions, etc: they’re called PCC/PCI, or pre-combat checks and pre-combat inspections. The idea is that before you head out and do something using equipment upon which your life may depend, you want to check it’s functionality and inspect to make sure you have everything you will need.

Me with my Fire Direction Control section at AT in 2019. The amount of planning necessary to make it a success started a year before movement.

PCC’s are done by the individual Soldier, while PCI’s usually are either peer inspections or conducted by your next immediate leader. The term “PCC/PCI” is often used almost as a single phrase, but while they’re related, they are not the same thing nor are they interchangeable. They are, however, also often conducted together, especially before important missions.

Ever since Sherry and I got involved with overlanding, we’ve adopted many of my military habits, and one that has ensured our success time and time again has been PCC/PCI’s.

Step 1: Planning

Checklists, checklists, checklists. We make lists for everything: individual packing lists, vehicle packing list, vehicle inspection checklist, trip plan (campsite listing), meal plans, and grocery list. I also make a T-2, T-1, and D-Day checklist to ensure I’m not missing anything. I can’t stress enough how much this not only helps, but keeps us from finding out too late in a trip that we left something important (or even trivial) back at home. In all our trips so far, we’ve never found that we left something behind. We may have not immediately remembered where we packed something causing us to mistakenly think we left something behind only to find it later, but our track record so far has been solid.

Excel or Google Sheets are great for making these lists as they have tabs you can use for each different list. My wife uses a standard document for her checklists, and I’ve also used my personal Wiki to keep track of these lists. Whatever works best for you, and whichever method you will actually use will be best.

Step 2: Packing and Preparation

This was my staging for Warrant Officer Candidate School Phase II before I packed everything up. I checked my list at least a dozen times to ensure I didn’t leave anything behind.

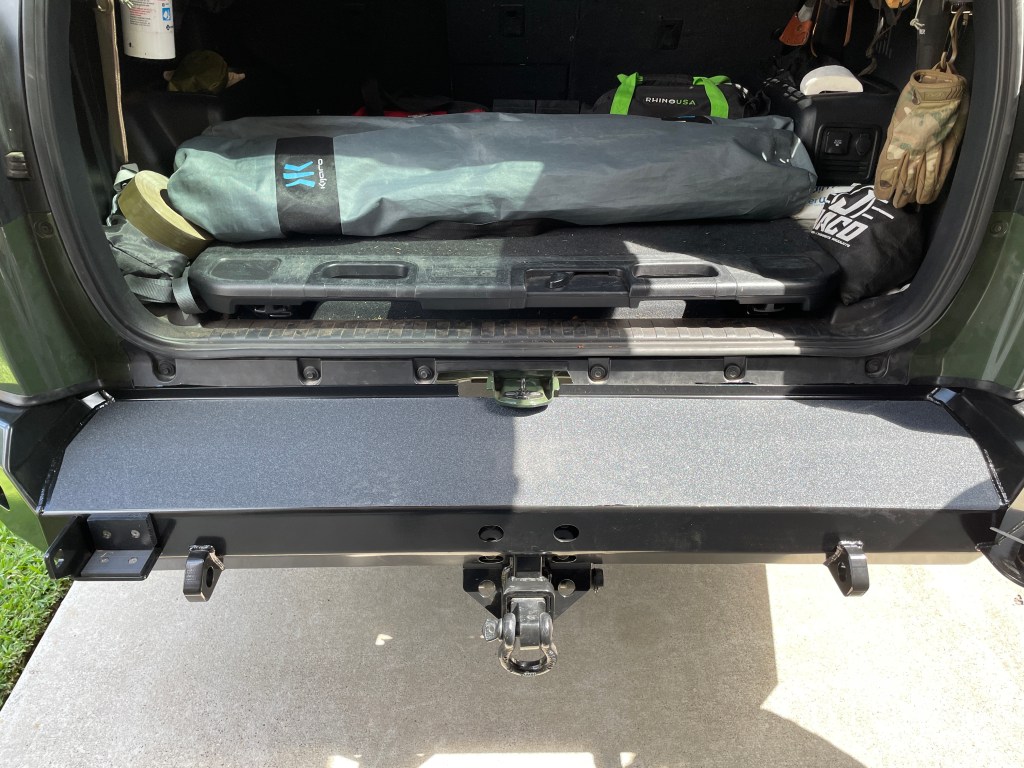
Since we start our logistics planning weeks or months in advance, it makes it easy to start putting things together and getting them ready for the trip. About a week before we depart, we begin staging our gear. That means we put it into a reserved place in our home so that we can track what’s ready to go, and what’s missing.

The benefit of this staging is that it allows us to begin the pre-loading process and to ensure we get everything on the list not only ready to be loaded, but we also take the time to inspect and check everything.

Step 3: Checks and Inspections

One major step in preparation is trying or testing everything before we go. The last place to try something new is at a campsite in bad weather. We learned this lesson the hard way when we tried to put the anteroom onto our rooftop tent. We didn’t test it prior to going on our big trip last year, and we found out in the 24 degree cold that it wouldn’t fit due to the awning we had mounted to the side of the roof rack. We lugged that anteroom around for two weeks, unable to use it. It took up a lot of space and was heavy, too.

I also take the time to ensure every pice of gear I’m taking is functional, appears to be in good working order, and if I find something not quite up to par, I replace it. That’s why starting the checks and inspections a week before departure ensures we have everything we need, when we need it: D-Day. This year, we discovered a few things were missing and we were able to get them either locally or online in time for our trip.

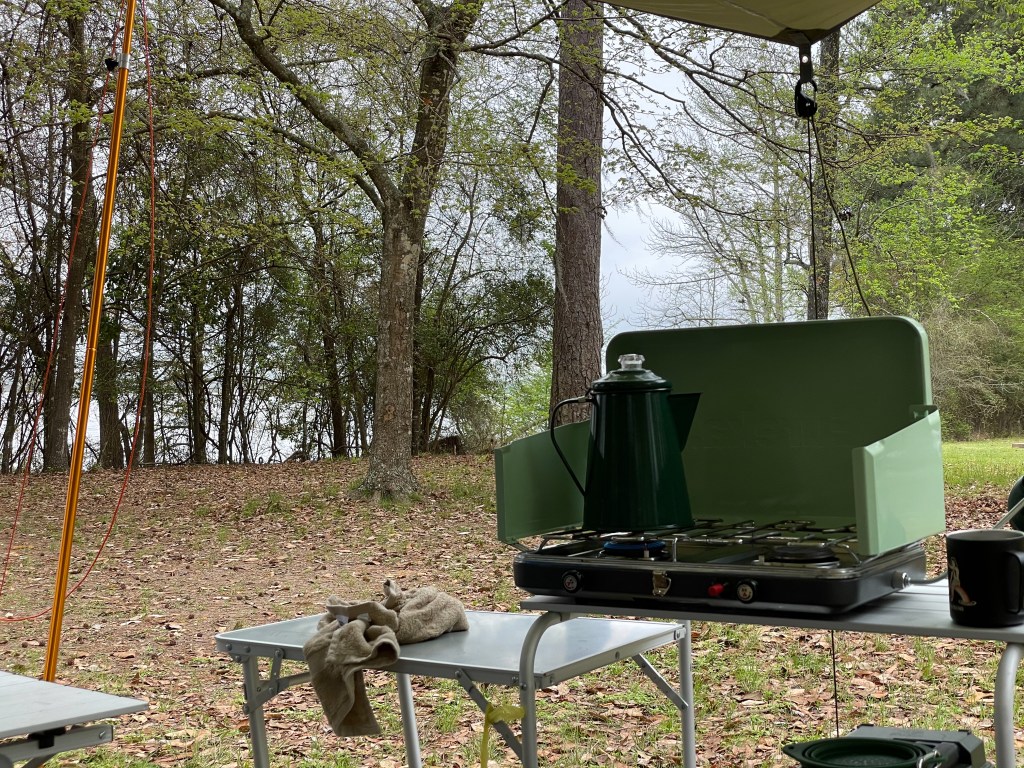
I also begin charging all the batteries of everything we will use that requires them. For my Power Tank, I go and get it refilled even if it feels full. I like to know that it’s at 100% capacity before heading out. We check our propane tanks and I refill our small 5 lbs tank as well. Everything that can sit for a week is topped off.

Step 4: Final Preparations/Pre-Departure

Like I mentioned earlier, I have T-2 and T-1 checklists I follow. Our T-1 checklist, for example, has us turning on our Dometic refrigerator so that it will be cold and ready to have food put in it on D-Day. On D-Day, I have final vehicle inspections that I perform as well as filling our water containers and topping off the vehicle with fuel.

We perform one last sanity check just before departure and go over checklists and mentally make note of everything we’ve packed, loaded, and prepped. Once we are confident we have everything, we leave and don’t look back. One thing we’ve learned is that if something unexpected happens (like the extreme cold last year) that we didn’t prepare for, money will typically solve those problems. We bought cold-weather gloves that we never thought we’d need. I will be taking these along this time… just in case.

Final Thoughts

Our lists aren’t set in stone, and we are constantly evolving our pack-out gear and lists. For example, we replaced our Biolite fire pit with a Snow Peak Takibi fire pit and grill, and we replaced one of our Iron Boxes with two RUX boxes. It’s all about evolving your gear to make your life as easy and comfortable as possible while roughing it.

This is the goal: a stress-free and relaxing time out in nature.

Everyone has their own methods for planning and preparing for a trip. I recommend finding a way that keeps you organized and allows you to be as prepared for your trips as possible. The above is how we get it done, but there are many variations on our method that I’m sure will work for you. Just make sure whatever you take works, and make sure you pack what you will need.

Categories
Mods

Wrenching With My Son

Yesterday (Labor Day in the US), my son Brendon and I took the day off to do some final work on both of our vehicles. We started with the Apex Overland recovery points that came off the Gunship when we put the Shrockworks Ultralight bumper on it (which negated the need for the Apex Overland recovery points) and put them on his 4Runner. This was a very simple task, and we had it complete within about 20 minutes.

The next portion of the day’s events took much longer, mostly because we needed to buy some tools to get the job done, namely the 4.25” circle saw. I had purchased a TJM snorkel for the Gunship, but it wouldn’t fit due to the roof rack. So, I decided to make it an early Christmas present for my son, one that will come in handy next week on the trails we will be on as he will be the trail vehicle (I will be lead).

We began the process with Brendon taking out the air box and disconnecting the requisite pieces. He then removed the lining of the passenger side front wheel well which wasn’t very easy to do because of the way the clips are put in. But, Brendon got that part done and we began the process.

Brendon preparing to drill holes in a perfectly good fender.

I cut out the fender template and taped it onto the vehicle while Brendon got the drill out and drilled out the necessary holes. He then cut out the larger hole for the TJM snorkel.

Holes in the fender.

After test-fitting the snorkel, the next scary part of the job was drilling two holes into the A-pillar. He measured twice and drilled those two holes carefully (and they were perfect). I then helped mount the snorkel by reaching up into the fender and tightening the top-most nut as the area was tight and my arm/hands are smaller than my son’s.

Once we got the snorkel bolted on, Brendon connected the portion inside the fender that connected the snorkel to the air box and we finished up that part of the job.

The beauty shot with the red Apex Overland recovery point visible beneath the fog lights and the snorkel prominently in the middle.

We then moved on to working on both of our rigs at the same time, mounting ARB differential breathers. These were super-simple to do, and took roughly 30 minutes to complete from first wrench-turn. We will now feel safer with water crossings.

We finished up around 7 pm, and we were both smiling. We got a lot done, his 4Runner has some added cool factor and usability, and he told me last night he was even getting slightly better gas mileage.

Our next big trip starts later this week, so expect a lot more here soon!

Categories
Overlanding

Fall Trip 2021

This year, our trip will take us to some familiar places, but also to more new locations we’ve never visited before. This year will also see my son, Brendon (along with his girlfriend) coming with us in his 4Runner.

We will start by staying near Amarillo before heading up to Colorado where we will go on the Medano Pass in Sand Dunes National Forest. I enjoyed our visit there last year, despite bending a knuckle on the front-right suspension of the Gunship. It was my first real trail, and only our second true overlanding experience (primitive/disbursed camping site).

Last year’s visit to Arches… and I took a photo with none of the Arches behind the Gunship!

We will then go West toward Utah where we will visit some National Forests and do a lot more off-roading and primitive/disbursed camping. Next up will be Forestry Service trails and a visit to the Grand Canyon where we will have our refit/reset stay at a hotel.

Then, it’s back on the road with visits to more National Forests in Arizona and New Mexico before heading back home to Texas. Our first and last days are long drives, but we’ve done that before, and we prefer spending more time outside the state of Texas than in it as there are surprisingly few good sites along our path coupled with the general discomfort of camping in heat.

We are really looking forward to the trip, and while I likely will be unable to post during the trip, I will be keeping a record of all the places we stay with photos (also from our drone) and I will post a recap here.

In the meantime, we are in the process of making final preparations and doing gear-checks (known as PCC/PCI’s in the Army). My wife thought I was silly for doing these checks until we skipped testing the awning for our tent before going on our last trip and finding out too late that it didn’t fit our setup. That was a big piece of gear to haul around and have to unload and load into the vehicle every day.

The Gunship is nearly ready to go.

All vehicle modifications have been done on the Gunship (with one exception below), and while I do have a TJM snorkel arriving today, it’s uncertain as to whether this will go on my vehicle or my son’s. My wife seems to think we don’t need it. While I disagree, it will also come down to whether it will fit with my Sherpa Equipment Co. Crestone roof rack.

The outstanding Apex Overland recovery points on my vehicle before removing them.

Also for my son’s vehicle, we need to mount the Apex Overland recovery points which were removed from the Gunship when we put the Shrockworks Ultralight bumper on (the new bumper takes the place of the Apex recovery points).

I’ll be doing a final going-over of the vehicle this weekend to ensure all nuts, bolts, and add-ons are firmly attached. My son and I are also going to add ARB diff breathers to both of our 4Runners as we will be doing a few water crossings and we’re not sure how deep the water will be. It’s better to be safe than sorry.

Otherwise, we are prepped for the trip. My wife and I are ready to go now and joke all the time that we can always just leave a little early. There’s just this matter of our jobs getting in the way.

Categories
Accessories Overlanding

Review: Shrockworks Ultralight Bumper

The latest project on the Gunship is the Shrockworks Ultralight Bumper. I decided on the Ultralight because I didn’t want an entire new front-end, and I actually like how the 4Runners look from the front and I didn’t want to disrupt its iconic look. The Ultralight does a great job of combining functionality with good looks.

I enlisted the help of my son, Brendon, and my brother-in-law Kevin who helped with connecting the winch to the battery. Not that it’s difficult, but he used to work on nuclear missiles for the Air Force; I figured he’d be much better at electrical stuff than I am.

Brendon taking a quick break to message a friend.

The first task to be completed was disassembly of the front end. We were able to get the front bumper cover off easily and the bumper assembly was actually quite easy to remove. Then came the bolting on of the new bumper/winch support.

This was possibly one of the most anti-climactic installs of anything we’d ever done to this point. Once the winch support was in place, we just needed to bolt the winch onto it, which was very easy.

Cutting on the bumper cover was probably the most nerve-wracking part, because cutting on an otherwise perfectly good piece of a car always makes me a little nervous, but once again, Brendon proved to be the expert and did an amazing job cutting out the portion that needed to be removed.

We put the bumper cover back onto the Gunship and everything fit nicely. At this point, everything is going really well.

We fit the bumper onto the winch support, and this is where things went slightly awry. First, we had a hard time getting everything to line up and fit in properly. It wasn’t due to the design of the bumper; it was due to how much plastic we left on the bumper cover. We could have removed the bumper and cut some more on the bumper cover, but we decided against it. We were able to make it fit, and eventually, once the bolts seated, everything looked good.

Second, it wasn’t very clear in the instructions which bolts we were supposed to use, and the bolts we had in the kit didn’t quite match the bolts in the photos with the instructions. We had to make a trip to Lowe’s to get some bolts, lock washers, and washers to finish the job properly.

We also put the small aluminum skid plate on, as Mark at Shrockworks said it would work with the TRD Pro skid plate. Well, it doesn’t. And that,s okay, quite frankly. At this point, since I don’t have full armor beneath the Gunship, the TRD Pro skid plate actually covers more and is more functional. Once I replace it with more steel under the vehicle, I might go back to this small aluminum piece, but for now, we decided to remove it and put the TRD Pro skid plate back on.

At this point, we were done. I put a bow shackle/D-Ring on the bumper and tightened up the winch to keep the hook stowed. I am quite happy with how it looks, and with how it functions.

What I like

I really like the functionality and looks of the Shrockworks Ultralight Bumper. While I was initially inclined to get the C4 Ultralight, I decided on Shrockworks due to my experience in the past with their products (my rock sliders, rear bumper, and my son’s rock sliders all came from there). The workmanship is really good on the steel parts.

What I don’t like

So, something that seems to be pretty common for Shrockworks is not having the right bolts/nuts for the job. With the exception of the rock sliders, the rear bumper project and now the front bumper project both needed a trip to Lowe’s to get the right hardware. I’ve seen this noted online elsewhere, and even though it’s not a great expense, it is annoying.

The finishing on the aluminum skid plate was pretty rough. Even though this part is not as visible as the bumper itself, it seemed like the part was rushed.

Why the Shrockworks Ultralight Bumper

Shrockworks is a local company here in Houston, Texas. While that’s not the main reason I chose this product, it is something I did consider. I like helping local businesses, and knowing that the company is right here, close to home, adds some peace of mind in the unlikely event I need support from them on this or any of their other products.

The reasons I chose the Ultralight are:

  • Functionality. The Ultralight fits every need I have: winch support, recovery points, and strong construction.
  • Price/Value. For me, the cost was similar to competing products, but I really liked the construction and looks of this bumper. For what I got for the money, I felt it was a good value.
  • Quality. The Shrockworks products are always well-made, and this bumper was no exception.
  • Durability. While I haven’t had this bumper for a long time, I have had Shrockworks rock sliders on my vehicle for over a year and a half, and the Shrockworks rear bumper on for over half a year, and both are holding up perfectly.

Final Thoughts

I really like the Shrockworks Ultralight Bumper, and I recommend anyone looking for quality add-ones for their off-road rigs give Shrockworks a try. The bumper is a good fit, looks great, and is a relatively easy mod that gives your rig a lot of utility and added security on the trails.

As a final note, I want to give some credit to Mark at Shrockworks, as he went above and beyond to ensure I received the front bumper before my last opportunity to mount it prior to an upcoming trip. He arranged for me to pick up the winch support and bumper from the powder coater, and everything went exactly as he said it would.

Categories
Overlanding

Purpose-Built for Function

I was asked online (on Facebook, if you must know) whether I put the mods onto the Gunship because I actually use the mods, or because I just like how they look.

Sigh.

I get it. There are people out there who build up these huge rigs, spending tens of thousands of dollars, only to drive it to the mall or to the soccer games on the weekends. There are people whose idea of wheeling/off-roading is a gravel road on their way to grandma’s house. I can certainly say that I’m not one of those people.

I love to go wheeling, I love going off-road, I love overlanding, and I love camping. I also love mountain biking, hiking, and kayaking. The Gunship has been purpose-built for all the things my wife and I like to do. Everything has a function, and in some cases, when we’ve found something was superfluous or unneccessary, we’ve gotten rid of it.

Do I go mudding? No. I’m not into mudding. My preference with wheeling/off-roading is sand, rock, dirt, and trails. That’s about it. If I have to do a stream crossing or go through mud, I’ll do it, but I don’t go looking for mud holes to go through. It’s just not my thing (and I have nothing against anyone who loves mudding).

So, everything on my list of mods and supplies are things we actively use and have tested extensively. If we don’t use it, or find it’s no longer something we need or we find a better alternative, it comes off the list.

Categories
Mods Overlanding

Shrockworks Rear Bumper

This past week, I was finally able to pickup the completed rear bumper with tire carrier from Shrockworks. Since they’re local and only 20 minutes away from my home, it’s incredibly convenient for me to do local pickup on items I buy from them. After my friend Kenny helped getting the bumper home (we put it in the back of his Tacoma), my son helped me put it onto the Gunship.

The instructions were pretty straightforward, and I watched two installation videos on YouTube to get a better understanding of how to get the bumper mounted. The first step was to remove the bumper cover from the Gunship as well as some fender liners and other parts. This was simple and took less than 30 minutes.

Gunship with her rear bumper removed.

Prior to mounting the Shrockworks bumper onto the Gunship, there was some minor assembly required of the stops that keep the swing-arm from slamming into the bumper when closed. It was here that I made a mistake in not putting two of the 1/4” pieces on, and this would prove to be an added difficulty once the bumper was mounted. From here, it was just a matter of mounting the new bumper onto the existing bumper which was actually the rear of the frame.

We put the shims under the rear mounting portion to level the “Wings” of the bumper as much as possible, and then tightened down all the bolts. The sticknuts weren’t difficult to place unlike the two we needed to use when putting on the rock sliders. The next step was to put the wing supports on, and once again, these were easy to do.

After getting the entire bumper properly mounted and all bolts tightened, I put the swing-arm on. This swing-arm is where the spare tire and two jerry can holders are mounted. It took the help of my wife to get the large bolt in-place, but it was easy enough to get it properly set. It was then that I discovered, as I stated earlier, that I didn’t have enough of a bump stop between the swing-arm and the bumper which required me to get the additional 1/4” hard plastic on. This took nearly as much time as it took to get the entire bumper on due to the strange and cramped position I had to get my hand into to properly secure this additional piece of plastic. It did, however, get mounted properly, and the result was a properly and firmly closing swing-arm.

The bumper and swing-arm both mounted and set for the final step.

The final step was, for me, the scariest; cutting of the stock bumper cover. This step required concise measuring and careful cutting to ensure uniformity of the space between the bumper and the fender. Fortunately, my son is a mechanic at a custom off-road shop, and he has a lot of experience cutting body parts. He expertly trimmed the plastic and the result was a very clean look.

I’m pleased with the build quality of the bumper. The powder coating is well done with only one spot that didn’t properly coat; the top of the swing-arm, near the high-lift jack mount. After a light rain, I spotted rust there. I will have to paint in that spot to keep it from spreading. I also didn’t receive about a dozen of the necessary bolts to complete the project requiring me to go to Lowe’s to pickup the necessary hardware. As for the latches to fit over the water jugs, I had to bend them slightly to allow them to close. Aside from these minor issues, the fit and finish is outstanding.

The swing-arm opens easily, and it has a hold-open that keeps the arm from slamming into the 4Runner or to close when the tailgate is open. The spare tire mounts easily, and the license plate holder and light, both included, were easy to install and to get wired with minimal effort (you will need a connector and solder). The bumper also has two hard points onto which bow shackles/D-rings can be attached for recoveries.

The two modifications my son and I made are visible here: the area above the bumper and the non-skid surface.

Two modifications my son and I made to the procedure. First, we cut the center portion of the stock bumper in such a way that it covered the gap between the bumper and the body of the Gunship. This makes it look nicer and gives it a more finished look. Second, I put some grip tape on the top of the bumper so that it is non-slip when we step up onto it (which we do every time we put the rooftop tent up or put it away.

I recommend the Shrockworks Rear Bumper as a good addition to any overlanding or off-road 4Runner as they are well-made, they look good, and they are reasonably priced.

Categories
Overlanding

Texas State Park Review: Martin Dies Jr. State Park

Our most recent camping trip took us to Martin Dies Jr. State Park. It’s located about two hours East-North Est of Houston near Jasper, Texas on the shores of Steinhagen Reservoir. The area is wooded, and there is lots of wildlife at this park.

We were able to check in very easily with what was probably the quickest and easiest check-in we’ve had at any state park. The map directed us to our spot which Sherry picked for us and was right on the lake. Although it was cool and windy the weekend we went, the tall trees helped mitigate some of that wind.

The view of the reservoir from our campsite at dusk.

The campsite we had reserved was spacious and could easily accommidate two tents and two vehicles. We parked the Gunship on the provided space and pitched the Tuff Stuff Alpha roof top tent.

It was also our first time using the Joolca Hottap water heater. While we didn’t use it for showers, it was very nice to have hot water to do the dishes after meals. The campsite we were at did not have electricity, but it did have water (directly over my shoulder in the photo above).

The reservoir is very large and people into boating, kayaking, and canoeing could easily find days worth of exploring around the park. I did see a lot of people fishing from their boats as well. We brought our kayaks with us, but it was too windy to be safe, and we didn’t want to risk it. Besides, we had Buddy, our Shihtzu with us, and we didn’t want his first kayak ride to be scary.

Speaking of pets, the park is pet-friendly, and there were lots of dogs at the campsites around us. The dogs are required to be leashed at all times, however, so if you do bring your dogs, make sure you have a leash.

We were able to get some hiking in, and while the trails aren’t very long, they are very well maintained and it’s a very pretty trail and area. We haven’t ever hiked in an area like this, and the trees and plants were very interesting to look at.

There are alligators in the area, so that is something to be aware of, but we didn’t see or hear any. We did see some oppossums and squirrels, though, as well as many birds. The people at the campsite next to us were bird watchers, and they were having a great time looking at all the winged wildlife.

All in all, it’s a really nice park. It’s spacious, the campsites are well-maintained and clean, and the interactions I had with the staff were all positive. The fire wood was a bit on the pricey side ($1/stick) which made me glad I brought some purchased locally outside the park.

Of all the parks we’ve been to so far, I’d put this one on-par with Fairfield State Park which is rated a 7/10. However, this park has larger campsites, a much larger body of water, and it just felt more secluded. Therefore, I rate this park at 8/10. It is a very-well laid out park in a very nice location with lots to do as long as you’re into kayaking, canoeing, boating, hiking, and/or biking.

I recommend using the Reserve America website to secure a campsite well in advance. One of the realities of the world in COVID-19 is that more people are visiting parks and forests than ever, and unless you have a reservation, you will likely be unable to camp at a standard campground. We have been using Reserve America with great success since last year. It makes the reservation process easy and reduces the wait during check-in.

Categories
Outdoors Overlanding Park Review

Texas State Park Review: Fairfield Lake State Park

A state park that Sherry and I visited on a whim last year turned out to be a very nice getaway from home and had one of the most beautiful sunsets we’ve seen on our camping trips. Fairfield Lake State Park near Fairfield, Texas is about two hours North of Houston and is on a nice-sized lake that allows boating and fishing and many hiking and biking trails through hilly terrain.

The park is rather large and there are many opportunities for hiking and biking on the many roads and trails that go around the South and South East side of Fairfield Lake. This was one of the first campgrounds Sherry and I visited when we began overlanding and was before we got the Tuff Stuff Alpha Roof Top Tent. The campsite we had was smaller than some of the other parks we’ve been to, but still spacious. We were much closer to people behind us, and we were able to overhear their conversations well into the wee hours of the morning.

Before our Roof Top Tent, we used this green 4-man tent. With two cots inside, it’s comfortable for two adults. Without the cots, it’s less comfortable but would definitely fit 4 adults.

The campsite had water available, and also had built-in firepit and a pole for hanging a light or lantern as well as a cement pad with a picnic table.

The lake itself is nice and large. We did some wade fishing, and we each caught some fish, although Sherry caught the biggest. We did see boats on the lake, but there wasn’t an excessive amount of them. Most people with boats were fishing and weren’t really scooting back and forth that much.

This was the sunset we were greeting with on our second night at the park.

We had a chance to do some light hiking, and we saw armadillos rooting for food as well as a raccoon that came up to our campsite and stole a piece of aluminum foil that we had baked some brownies in. It was cute, and we watched as it licked the foil to get the chocolate remnants off. We also saw squirrels and many birds.

This is a rare photo of me torturing Sherry on a bike trail. She’s smiling only because she knows where I sleep.

For me, the highlight was our bike riding. The trails were a lot of fun and not too challenging. The hills on the bike trails we went on were not that severe and were easier than Huntsville State Park but more of a challenge than Stephen F. Austin State Park. The real challenge, however, came when we decided to ride our bikes on the main road from our campsite up to the office to complete check-in (which we missed on Friday night because we arrived after the office was closed). While I had a good time with it, Sherry suffered quite a bit with the big hills. It felt, to her, as if we were going up-hill for most of the trip there. Maybe she was right, because the way back was much easier and faster, although there were still a few pretty big hills to climb before we made it back to camp.

The trees here are pretty and provide lots of cover for camping. They sounded amazing during the thunderstorm with the wind blowing through them.

This park is very nice, and the trails are well maintained without too many roots on the trail. There were only a few muddy spots on the trail, but it did rain the night before, so this was to be expected. The majority of the trail was clear.

The boat launch areas look very nice, and there’s a lot of room for parking larger vehicles with trailers.

This is another park we have considered returning to. Although it’s twice as far from our home than Huntsville State Park or Stephen F. Austin State Park, it is worth the trip. I haven’t been able to get Sherry to go back there yet because she knows I would want to ride bikes there and the hills were pretty big, but we both want to kayak on the lake, so I might be able to talk her into a trip there this spring.

Our campsite from the access road.

Compared to other parks we’ve camped or overlanded at, I’d have to give this one a 7/10 for the smaller campsites that are grouped closer together than other parks. The lake is amazing, though, and the bike trails are a lot of fun.

I recommend using the Reserve America website to secure a campsite well in advance. One of the realities of the world in COVID-19 is that more people are visiting parks and forests than ever, and unless you have a reservation, you will likely be unable to camp at a standard campground. We have been using Reserve America with great success since last year. It makes the reservation process easy and reduces the wait during check-in.

Categories
Outdoors Overlanding Park Review

Texas State Park Review: Huntsville State Park

The first state park Sherry (my wife) took me to after we both lost a bunch of weight was Huntsville State Park for a hike. Little did I know back then that we would return to this park more than a few times for camping, hiking, mountain biking, and even kayaking.

Huntsville State Park is located just North of Conroe, Texas about an hour or so North of Houston. It’s pretty close to I-45 which makes it easy to get to, but it also means that at night (especially when the air is cooler), you can still hear the highway, but it’s not too bad.

The park has lots of beautiful views, tables for picnics, and barbecue stands for day-use.

The hiking/biking trails are pretty amazing. In many places, there are a lot of roots growing into them which, on the hilly portions, makes for natural steps for hikers but introduces a higher degree of difficulty for bike riders. I found the challenge of the roots to be fun while Sherry hated them. The hills are also pretty big and require 1st gear and a lot of leg work to get up. Sherry walked her bike up most of the big hills, and I don’t blame her. I feel comfortable on a bike pedalling fast and moving slow, even up-hill, the result of riding bikes extensively in my youth. Sherry rode bikes as a kid, but not nearly as much as I did. This is something to consider if you want to go mountain biking and are not experienced; Huntsville State Park’s trails are what I would call intermediate level.

One of many trails in the park.

For hiking, the trails are really good and will get your heart pumping. The hills are pretty big, but not so steep or big that you get winded. The views are serene and the forest is beautiful with many different types of trees, underbrush, and wildflowers (especially in springtime). The trail we took goes around Lake Raven, the central attraction at Huntsville State Park.

On our third trip to the park, we took our Tucktec kayaks and spent hours on the water. As it was our first time in these watercraft, we took it slow at first, but quickly became comfortable with them. We went from one saide of the lake to the other and back again within about two and a half hours. As a bonus, I almost capsized once due to horseplay, and I learned my lesson. A quick trip to the shore to pour the water out of my kayak was all it took to get back to the adventure, although my bottom was soaked.

Me in my Tucktec kayak on Lake Raven in Huntsville State Park as seen by Sherry.

The campsites are of a good size and well maintained with water available. On our third trip to the park, we stayed at an improved campsite for RV’s and even had electricity available, but we didn’t plug in. We like to practice living off our own resources as much as we can when we camp, even if power is available. The only thing we typically will use if it’s available is water, although we still find ourselves using the 5 gallon water containers pretty often. They’re just more convenient sometimes. The campsites are well-spaced from each other, and we never felt cramped or like campers next to us were too close. To the contrary, it feels very spacious and isolated, which is a good thing while camping.

This was an RV spot which was nice with our Overlanding setup.
The standard campsite was also a good fit for our setup. A neighboring campsite can be seen to the right.

The park has cabins, but we have not used those. We did see people staying in them, so it appears this state park has some sort of COVID-19 mitigation in-place for use between campers. The roadways are all very smooth, and the trails are well-marked. There is a wildlife center staffed by workers, and there is also a store that sells some snacks and basic camp supplies as well as fishing supplies. I don’t remember if they sell bait. They also rent canoes and pedal boats, and there is a swimming area that was closed when we were there. The water seems pretty cold, though, so we weren’t missing that opportunity. The park hosts are very friendly and helpful.

The wildlife is bold and used to humans. This squirrel and a buddy came close looking for handouts (which we kindly declined to provide).

Overall, I would rate this park 8/10. It has a lot of activities, amenities, and it is well maintained and staffed by friendly people. If the trails were a little more bike friendly, I would rate it higher (if only to get Sherry back onto the trails with me). I would gladly bike those trails again; they are a lot of fun!

I recommend using the Reserve America website to secure a campsite well in advance. One of the realities of the world in COVID-19 is that more people are visiting parks and forests than ever, and unless you have a reservation, you will likely be unable to camp at a standard campground. We have been using Reserve America with great success since last year. It makes the reservation process easy and reduces the wait during check-in.

Categories
Outdoors Park Review

Texas State Park Review: Stephen F. Austin State Park

Last week, my wife Sherry and I went on a Christmas Break getaway to Stephen F. Austin State Park in San Felipe, TX which is about 45 minutes West of Houston. It’s a small park on the West side of the Brazos River which is the longest river in Texas. It is wooded with pines and cedars and boasts some of the nicest and well-maintained hiking and bike paths I’ve ever encountered in a park. The terrain is not difficult, and while there are a few hills, they are very small as compared to many other parks in Texas.

The views of the Brazos River are very nice and while the river itself is shallow, it’s a slow-moving river that provides tranquil scenes and gentle water flowing sounds.

My wife Sherry in her kayak on the Brazos River.

We brought our mountain bikes and Tucktec kayaks with us and made use of both. The trails were exceptional, and my wife who usually isn’t a huge fan of mountain biking actually enjoyed the trails. She found them to be easy enough to enjoy with just enough challenge here and there to be interesting. I loved the twists and turns, and the few times there were dips and climbs, they were short enough to be fun without exerting too much energy.

Just before heading out on the bike trails.

The Brazos River was really a surprise. I’m used to faster-moving rivers, and the Brazos is almost lake-like. With the wind blowing from the South and the river flowing from the North, we were nearly stationary when not rowing, and the wind was strong enough to push us against the current of the river at times! The other big surprise is how shallow the river is; at some points, while over 30 feet from shore, the water was only 12-16″ deep! That meant our oars would often scrape along the sandy bottom of the river. At least we knew if we fell in, all we had to do was stand up!

Me in my kayak on the Brazos River.

The park amenities are very nice. The roads are all well paved, the paths well-marked, and the completed bathroom and shower facilities are among the cleanest and nicest I’ve seen. Near our camping site, the new bathroom/shower facility was under construction with an active crew that began work at 7:15 a.m. and they worked until aroudn 5:00 p.m. daily. They were what you expect from a construction crew: lots of loud noise and activity, but this is to be undstood, and there’s not much that can be done about this. Our campsite was directly across the road from this site, and had we known in advance that this construction was going on there, we would have likely picked another spot farther away from it.

Our beautiful campsite. The construction site was directly to the right of this photo.

Of all the parks in Texas we’ve been to so far, I rate this one very highly: 8/10. It may not be the biggest, it may not have the longest trails, and it may not have the most varied scenery, but it is very nice, the trails are amazing, the park is exceptionally clean, and the staff is very friendly. The campsites are well-manicured and well taken care of (the fire pits are swept clean before you arrive!). Our campsite had water, and I did see that the RV sites had electricity, as well. There are cabins available, but these are currently not in use, presumably due to COVID-19 restrictions.

If you live in the Houston area and are looking for a relaxing place to go for a hike, a kayak outing, a trail ride on a mountain bike, or to camp overnight, Stephen F. Austin State Park is a very nice park to visit. It’s far enough from I-10 that you don’t hear the traffic (a problem at Huntsville State Park), and the occasional wildlife sighting of deer, owls, hawks, and other birds make for a pleasant and refreshing time.

I recommend using the Reserve America website to secure a campsite well in advance. One of the realities of the world in COVID-19 is that more people are visiting parks and forests than ever, and unless you have a reservation, you will likely be unable to camp at a standard campground. We have been using Reserve America with great success since last year. It makes the reservation process easy and reduces the wait during check-in.